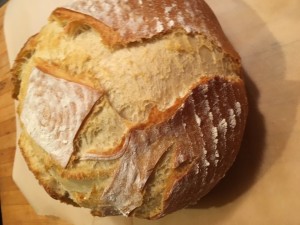
 Homemade bread, fresh out of the oven, is one of the easiest ways to get the family together. The smell alone is intoxicating. Add a little bit of butter to the mix and you are ready to enjoy one of the best rewards that baking has to offer. Soft crumb, nice crust, great chew…need I say more?
This is the first part of my bread baking tutorial. We’ll start with this no fail homemade bread recipe. This bread is surprisingly easy to make and is a great recipe to master as you can use it with little or no modifications and make amazing pizza dough, pretzels, bagels, and more. It is one of my favorite homemade breads to make and the kids always ask me to make more. This recipe is really easy to pull off and make, but don’t be fooled, the homemade bread that it makes is a crowd pleaser. Whether you are a new baker or an experienced bread maker, this bread formula is no fail. The hardest part about the whole thing is waiting for it to cool you remove it from the oven before eating!
This bread is a great bread to make if this is your first time baking. The ingredients are very basic and the process is quite straightforward. The only piece of machinery that I use is a stand mixer but you can also use a food processor (really, try it!) or your hands. For your very first time making homemade bread, I would recommend using your hands and big bowl so you get to know what the dough feels like at different stages, but if you don’t want to deal with dirty hands then the mixer or processor will do just fine.
Overview
I’d like to provide a high level overview of the homemade bread making process for the new bakers who may be reading this post. It really is not hard and I break down the process below in detail, but this is the big picture for this loaf. While sourdough and other breads have a few more steps, these are the basic steps for a homemade bread. It’s very easy.
- Mix the ingredients.
- Let it rest.
- Shape the loaf.
- Let it rest.
- Bake.
- Let it rest.
- Eat!
Ingredients
[table id=4 /]
Process
- Warm the milk to about 100˚F (about 20 seconds in the microwave) and add the yeast to it, mixing a bit to get everything wet.
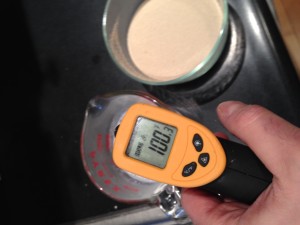
- While the yeast is activating, get your stand mixer out and add the flour, salt, and sugar to the bowl.
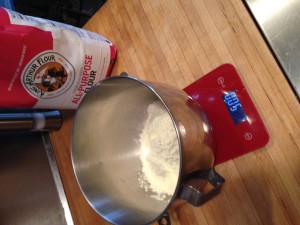
- With the dough hook attachment, gently stir the dry ingredients just to combine things.
- After about 5 minutes, add the milk/yeast mixture to the bowl and stir at slow speed “1” for about 3 minutes, then at speed “2” for another 3 minutes.
- If doing by hand knead for about 5 minutes, let the dough rest for 10 minutes to let it go through a process known as autolysis (without too much detail, it basically lets the gluten start to develop), and then knead for another 5 minutes.
- If using the food processor, pulse a few times until the dough is together and then process for about 25 seconds.
- This is what the dough looks like when you first start to mix it:
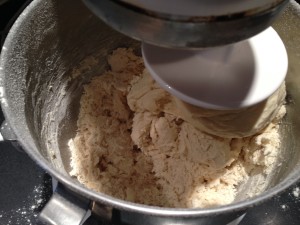
- This is what the dough looks like after about 2 minutes of mixing:
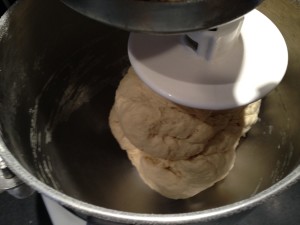
As you can see, it’s coming together but I’d still call this pretty rough. - After 2 more minutes, it’s ready to start the autolysis process to let the gluten really start to develop and strengthen the dough.
- This is what it looks like after sitting for 15 minutes:
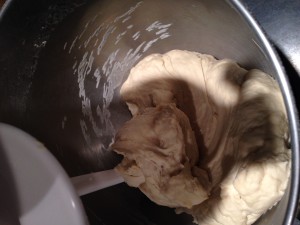
As you can see, it’s pretty ‘soft’ but strong. Do the Windowpane test to check how developed the gluten is – check out our video at the bottom!
- At this point, remove the hook and cover the bowl with plastic wrap. Leave at room temperature for about 90 minutes for the bulk fermentation to happen.
- After the time is up, dump the dough on to a lightly floured surface and knead for just a minute. Form in to a ball and place in to a proofing basket to rise. If you don’t have a proofing basket, get out a pasta colander, line it with a towel and dust the towel with flour. I call this a ghetto basket but it does the job just as well.
- Let the dough go through its final proofing stage for another 60 minutes. This is what my dough looked like after a rough pre-shape:
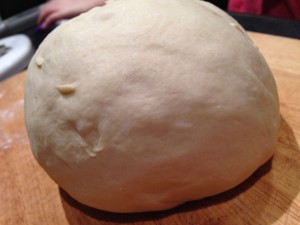
- About 30 minutes before baking, pre-heat your oven to 425˚F and put in a pizza stone on the lower rack.
- When it’s time to bake, gently get your dough from the proofing basket and on to a floured peel or piece of parchment paper.
- Score the bread with a knife or bread lame and slide the dough on to your pizza stone. Spray with water right away.
- After 20 minutes, rotate the bread and bake another 10-15 minutes. You know the bread is done by lifting it out of the oven and knocking on the bottom side. If it sounds hollow, it means it’s ready.
- Let the bread cool for a 10 minutes (if you can 🙂 ) and enjoy!
Here is how you do the windowpane test:
Leave a Reply