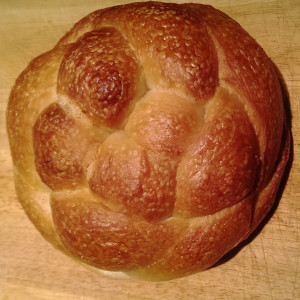
Sometime between the end of August and now, things got really busy and it seems like I entered a time warp. Since doing my last post I visited family in Boston, got bird poop on my camera, and made some really nice sourdough bread. The highlight of the baking were the sourdough challah loaves and the rounded ones were by far the prettiest. Since we eat with our eyes first, I guess they were the tastiest too!
Around this time of year I always end up baking quite a bit of challah. They’re delicious, for one, but also very versatile. French toast challah, ham and cheese challah, sour cream and challah, tea and challah, challah and honey, challah challah challah challah! It’s one of my favorites to make and everyone loves to eat it so I decided to try my hand at a 100% sourdough challah loaf.
For this recipe the key ingredient was time. From making sure the starter was good and ready to letting the loaves proof in the fridge before baking, the time spent in waiting was well worth the result. These turned out with a nice sour flavor, slightly sweet, fairly low on the richness scale, and perfect for any occasion from cheese plates to breakfast main item.
A note on the starter: As I mentioned, getting the starter good and ready was key. I started 3 days in advance feeding the starter and waking it back up as I keep mine in the fridge during the ‘down’ times I don’t bake. I fed my starter at first with 25g water and 25g flour, then 24 hours later with 50g flour and 50g water, then 12 hours later with 75g flour and 60g flour, and then one more final feeding 8 hours before using with 100g flour and 65g water. This is roughly a 75% hydration starter and it worked very well for this bake.
The final formula looked like this:
- 300g starter
- 400-450g water
- 950g flour
- 60g sugar
- 1 whole egg + 2 yolks
- 50g oil
- 20g salt
For the pre-bake wash, use one egg yolk and not quite all of the white + a little water to brush on your loaves.
[ezcol_1third]
Method
Mix all of the ingredients minus the salt and autolyse for 30 minutes. Add the salt and mix until fully incorporated. Let the dough bulk ferment and stretch & fold the mass every 30 minutes for the first 2 hours. Let it ferment for another two hours in peace.
Divide the dough in to balls weighing roughly the same amount. The number of balls and the weight will depend on how many strands you want. For my 3 rounded loaves of 4 strands, I used 12 balls of about 125g each. Cover in plastic and allow them to relax for 20-30 minutes.
Roll our the strands and braid your bread. Place the bread in a baking sheet lined with parchment paper and cover with plastic.
Put in the fridge overnight (I had some scheduling conflicts so mine ended up in the ice box for about 14 hours…no adverse effects noticed).
Let them proof at room temp once again for an hour or two and pre-heat your oven accordingly to 375˚F. Brush the loaves with the egg wash and sprinkle seeds, sugar, salt, or other toppings as needed and bake for about 35 minutes, turning the loaves half way during the bake.
Let cool and enjoy!
