• Skip to main content

Make Bread

A bread blog for home bakers

  • Bread
  • Pizza

Bread Tutorials

4.12.15 By nick Leave a Comment

Pretzel Rolls

pretzel rolls

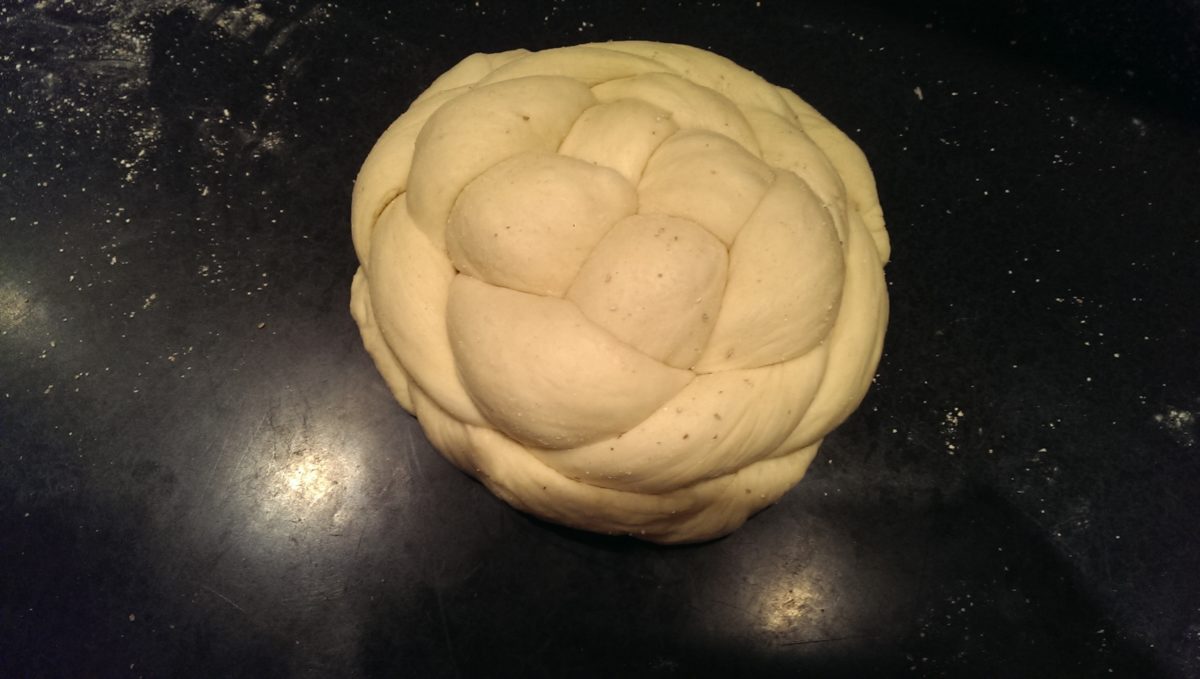
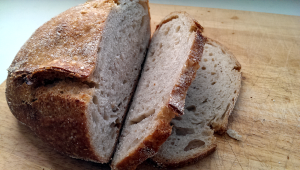
Last week was a busy week for our family.  Since it was Thanksgiving and my wife’s sister had a baby we decided to spend the holiday with them in Boston.  So we packed up the van and made the trek.  We had a lovely time visiting and spending quality time with the baby and the other family members who were there, but certainly one of the highlights of the trip was Thanksgiving day and the feast that accompanied it.  Especially kaiser rolls and these pretzel rolls.

As with any meal on a day deserving of capital letters, Thanksgiving is a treat.  Probably my favorite holiday since the food is outstanding, the weather is usually at least pleasant (this year it was outstanding for us!), the Christmas stress is not yet palpable, and everyone is generally in good spirits for the special day.  In order to not be a completely lazy husband and party guest, I like to bring or make some kind of doughy goodie for these kinds of meals, so since my sister in law and I both love pretzels, I decided to make some pretzel rolls.

Being at an ‘away kitchen’ is usually a test in and of itself and to make something without being too much in the way during a busy day is an added hurdle.  So with a little planning and cautious timing I was able to pull these off in no time by making sure I knew where things were ahead of time and getting things out and ready while people were away from the kitchen (a rare timing feat on Thanksgiving!).

Make something special for your friends

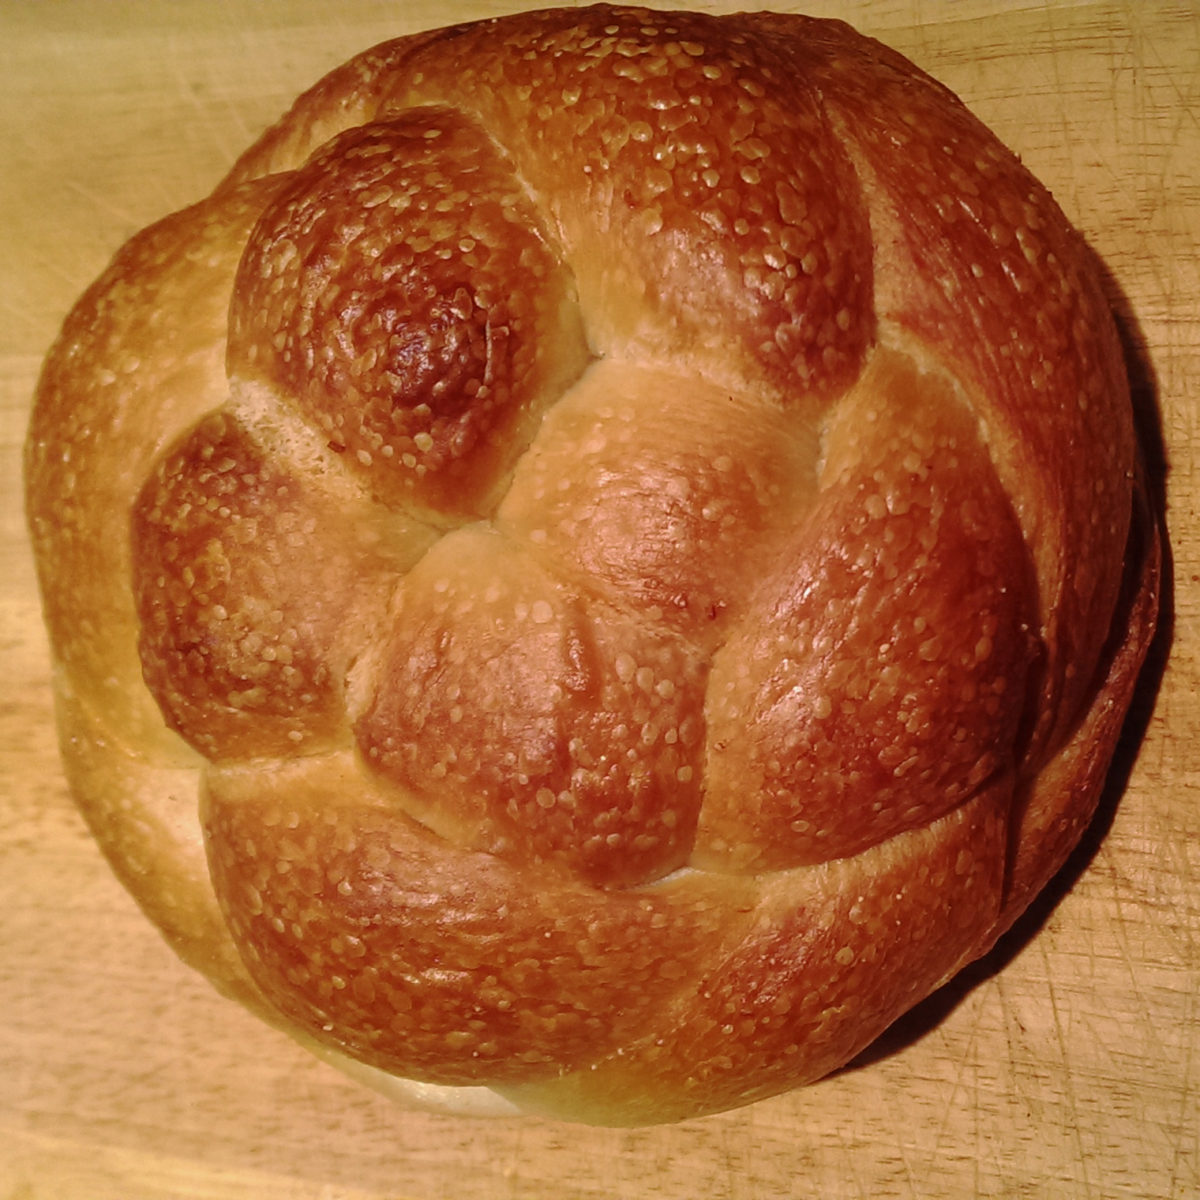
These rolls turned out to be delicious and were gone in no time.  I certainly didn’t make enough and next time I will be making 2 or 3 times as many since people will eat these, even if they’re trying to watch the holiday weight gain.  They are fluffy on the inside, nice and pretty on the outside, and the balance between sweet roll and salted pretzel make them an interesting companion to breakfast, lunch, or afternoon snack.

[ezcol_1half]pretzel-rolls-ready-to-bake[/ezcol_1half]

[ezcol_1half_end]pretzel rolls[/ezcol_1half_end]

Since I was away and didn’t have my food grade lye or scale with me, I eyeballed most of the recipe and it turned out just fine.  Don’t be afraid to experiment, you’ll be amazed at what you can pull off in a pinch!

For the dough, you’ll need the following:

  • 500g flour
  • 300g milk
  • 1 tbs sugar
  • 1 tbs salt
  • 1 packet yeast

For the ‘pretzeling’, you’ll need:

  • 1 egg
  • 2 tbs baking soda
  • 1-2 cups water
  • Pretzel salt

The basic steps are as follows:

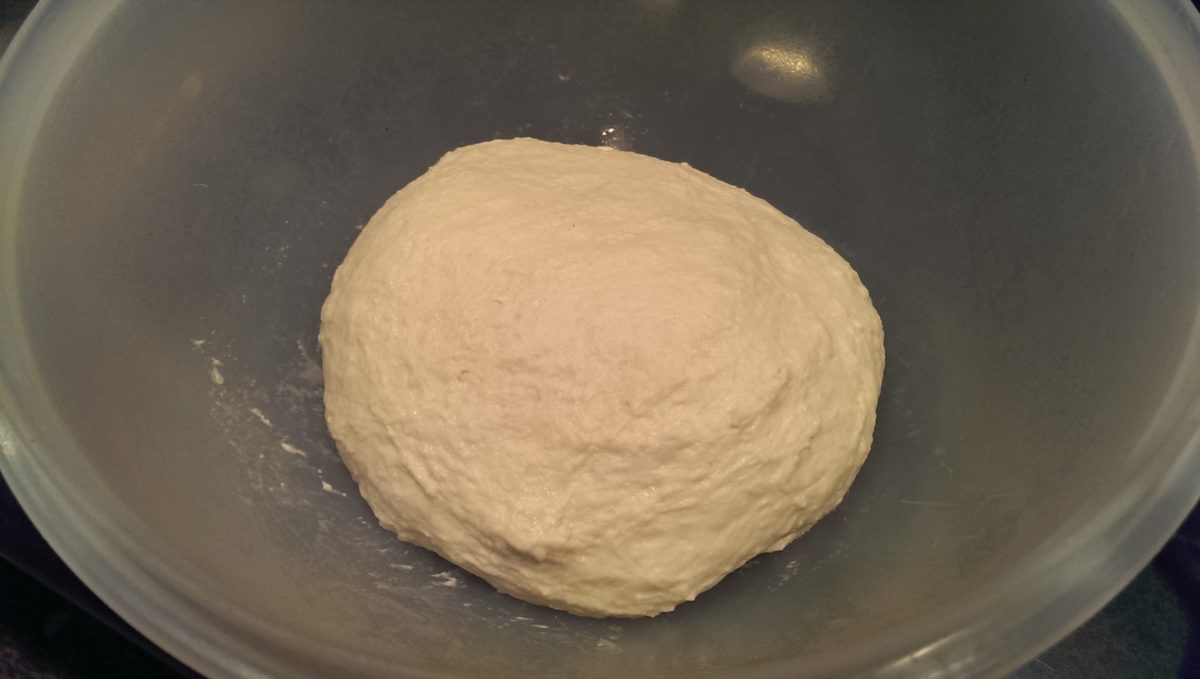
  1. To make the dough, combine milk, yeast, and sugar and let them get to know one another for a few minutes. Then in a separate medium sized bowl, pour in the flour and then add the wet mixture. Let it sit for about 10 minutes then add the salt and give it a good kneading for 5-10 minutes.
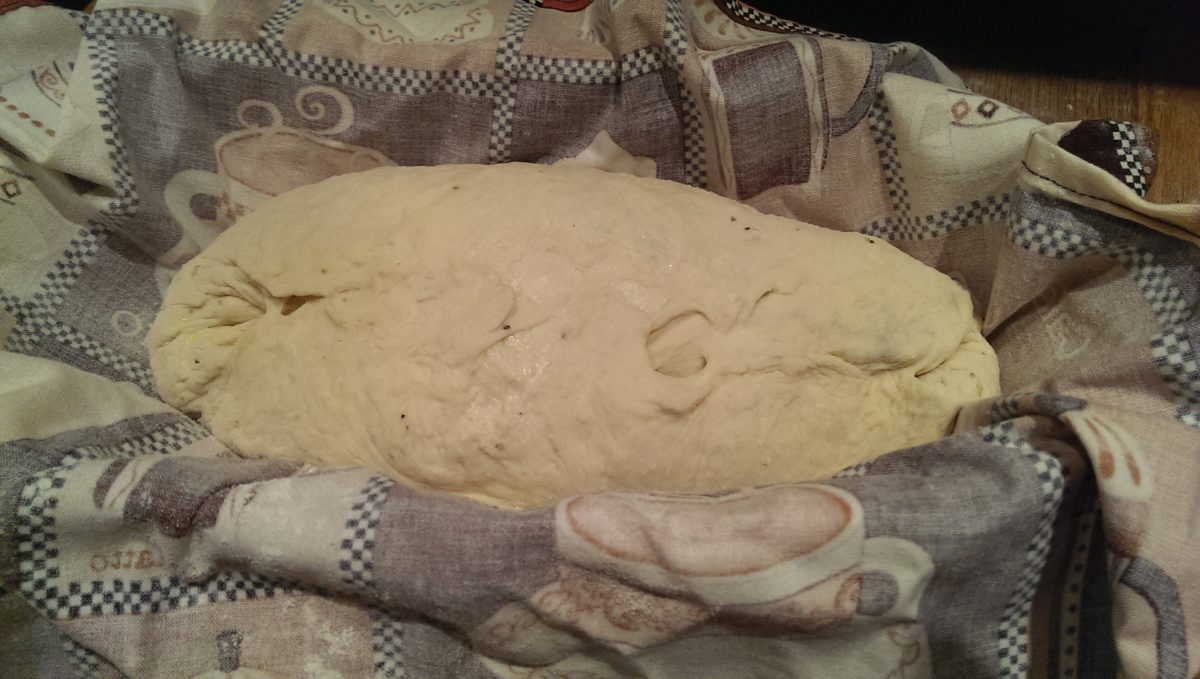
  2. Cover and let sit at room temperature for about an hour.
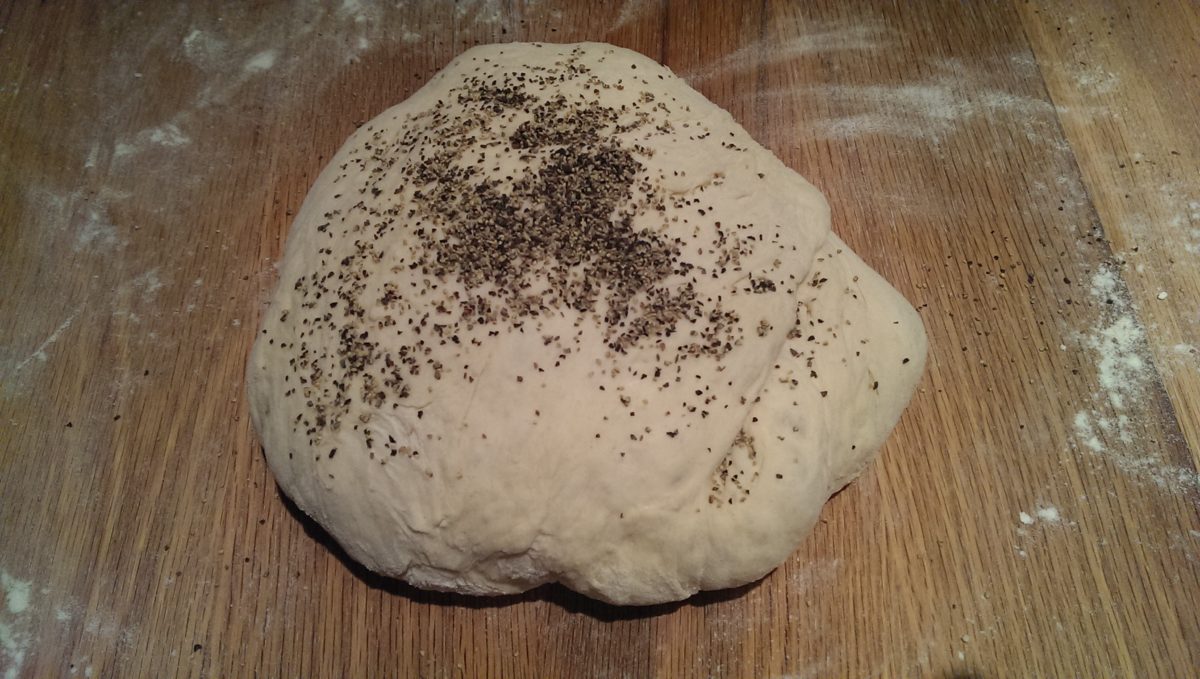
  3. Take the dough to a floured surface and pat the dough out in to a disc, roughly an inch thick.
  4. Using a pizza cutter or a knife, cut out in to 16 wedges (I only had enough for 12) and roll in to balls.
  5. In either a rectangular or circular pan, spray it down and place your dough balls near one another.
  6. Preheat oven to 375.
  7. Boil a cup or two of water and add 2 tbs of baking soda.
  8. Brush baking soda mixture on the rolls, let dry for 10-20 seconds and do a second brushing.
  9. Beat an egg and brush the rolls with the egg mixture, repeat if desired.
  10. Sprinkle pretzel salt.
  11. Bake for 20-30 minutes or until ready & consume when cooled!

At home I normally use lye for my pretzel needs.  I feel that it creates a superior crust makes the final product that much more authentic.  Baking soda does a nice job but I don’t think it’s as good as lye.   You can get good food grade lye on Amazon.  I purchased 2 pounds and think that it’ll last me 5 years!  Since lye is caustic, I am probably more cautious that I need to be but I always use long rubber gloves and make sure nobody is around me when I mix or move the batch of lye that I made.

Filed Under: Bread Tutorials Tagged With: bread rolls, pretzel, pretzel bread, pretzel rolls, rolls, yeasted pretzels

6.11.15 By nick Leave a Comment

Black Pepper Yeasted Loaf

black pepper yeasted loafEveryone bakes for a reason.  For some people it’s to literally put bread on the table.  For some it’s a fun way to spend a few hours.  For me, however, it’s about expressing my creativity in a form that is hopefully enjoyable and sometimes unexpected.  Take this week’s bake, for example.  I started out with just a few spare hours and ended up with something I had never baked or seen before.

Most of the time, before baking, I like to research a loaf and learn what others have done to achieve a successful bake.  Be it extended fermentation in the refrigerator or spritzing the loaf with water before baking, there’s always something to be learned from others.  That’s why I surprised even myself when I decided to just “wing it” with this bake.

Since my starter hadn’t been refreshed yet, I decided to make a nice loaf with a tad of black pepper for a little extra ‘oomph’.  After baking and tasting it, I thought “wow, that’s not too bad! I bet others have tried this too.” After going online and looking it up, I did see a few variations (which look amazing, and even better!) of a sourdough loaf with thyme and black pepper.  I might have to try those next time but for now, this is how this loaf came together.

[ezcol_1third]yeasted black pepper loaf[/ezcol_1third] [ezcol_1third]yeasted blackpepper loaf with pepper[/ezcol_1third] [ezcol_1third_end]yeasted black pepper loaf bulk[/ezcol_1third_end]

This is a loaf that can be put together and ready to serve in less than 4 hours – I call this a ‘relatively quick’ bread and will file it under ‘easy’.

Ingredients:

  • 500g ap flour
  • 300g water
  • 50g apple juice
  • 1 tbs black pepper
  • 1.5 tsp sugar
  • 1 tsp active dry yeast
  • t tsp salt

Procedure:

  • Combine the flour, water, juice, sugar and the yeast and mix until incorporated.  Let sit for 5 minutes and mix in the salt & pepper.
  • Place the dough in a bowl and cover until the dough roughly doubles in size, about an hour-ish.
  • Remove the dough and place it on a lightly floured surface and pre-shape the dough.  Let it rest for 5 minutes to allow the dough to relax a bit.
  • Turn on your oven and pre-heat to 425˚F
  • Shape you dough and place it in your proofing basked and let the dough proof for another 45 minutes or so.
  • When your dough and the oven are ready, turn the dough on to a floured peel, score, and load the bread in the oven.
  • Turn the bread after about 20 minutes and let it finish baking, another 15-20 minutes.
  • Let cool and enjoy!

Filed Under: Bread Tutorials Tagged With: baking, black pepper, bread, recipe, straight dough, yeasted bread

2.10.15 By nick Leave a Comment

Sourdough Challah

Rounded Challah Loaf

Sometime between the end of August and now, things got really busy and it seems like I entered a time warp.  Since doing my last post I visited family in Boston, got bird poop on my camera, and made some really nice sourdough bread.  The highlight of the baking were the sourdough challah loaves and the rounded ones were by far the prettiest.  Since we eat with our eyes first, I guess they were the tastiest too!

Around this time of year I always end up baking quite a bit of challah.  They’re delicious, for one, but also very versatile.  French toast challah, ham and cheese challah, sour cream and challah, tea and challah, challah and honey, challah challah challah challah!  It’s one of my favorites to make and everyone loves to eat it so I decided to try my hand at a 100% sourdough challah loaf.

For this recipe the key ingredient was time.  From making sure the starter was good and ready to letting the loaves proof in the fridge before baking, the time spent in waiting was well worth the result.  These turned out with a nice sour flavor, slightly sweet, fairly low on the richness scale, and perfect for any occasion from cheese plates to breakfast main item.

A note on the starter:  As I mentioned, getting the starter good and ready was key.  I started 3 days in advance feeding the starter and waking it back up as I keep mine in the fridge during the ‘down’ times I don’t bake.  I fed my starter at first with 25g water and 25g flour, then 24 hours later with 50g flour and 50g water, then 12 hours later with 75g flour and 60g flour, and then one more final feeding 8 hours before using with 100g flour and 65g water.  This is roughly a 75% hydration starter and it worked very well for this bake.

The final formula looked like this:

  • 300g starter
  • 400-450g water
  • 950g flour
  • 60g sugar
  • 1 whole egg + 2 yolks
  • 50g oil
  • 20g salt

For the pre-bake wash, use one egg yolk and not quite all of the white + a little water to brush on your loaves.

[ezcol_1third]divided dough[/ezcol_1third] [ezcol_1third]challah strands[/ezcol_1third] [ezcol_1third_end]Challah loaf[/ezcol_1third_end]

Method

Mix all of the ingredients minus the salt and autolyse for 30 minutes.  Add the salt and mix until fully incorporated.  Let the dough bulk ferment and stretch & fold the mass every 30 minutes for the first 2 hours.  Let it ferment for another two hours in peace.

Divide the dough in to balls weighing roughly the same amount.  The number of balls and the weight will depend on how many strands you want.  For my 3 rounded loaves of 4 strands, I used 12 balls of about 125g each.  Cover in plastic and allow them to relax for 20-30 minutes.

Roll our the strands and braid your bread.  Place the bread in a baking sheet lined with parchment paper and cover with plastic.

Put in the fridge overnight (I had some scheduling conflicts so mine ended up in the ice box for about 14 hours…no adverse effects noticed).

Let them proof at room temp once again for an hour or two and pre-heat your oven accordingly to 375˚F.  Brush the loaves with the egg wash and sprinkle seeds, sugar, salt, or other toppings as needed and bake for about 35 minutes, turning the loaves half way during the bake.

Let cool and enjoy!

Filed Under: Bread Tutorials Tagged With: baking, bread, challah, cheese tray breads, recipe, sourdough, wild yeast

11.08.15 By nick Leave a Comment

Pain Au Levain with Whole Wheat

bread-finalWhen it comes to making bread, one of the things I really enjoy is trying to make it LOOK good as much as I enjoy making it taste good.  This bread is packed with a little bit of rye flour, a little bit more whole wheat flour, and the rest is AP or bread flour.  Paired with fairly low hydration, this combination of ingredients make a nice looking, easy to shape delicious loaf.

Jeffrey Hamelman is somewhat of a superstar these days.  Not only is he the man behind the bakery at King Arthur’s home bakery his book is also well reviewed and award winning.  The recipes in this book are available in three versions, one for commercial quantities in metric, another commercial size batch in imperial, and one for the home baker.  As a home baker I just take the commercial quantity and divide by 100 to get my weights in grams.

This recipe starts with building a stiff levain with rye and whole wheat, which is then added to your final dough.  This bread is a little less hydrated than most and I deviated a bit from the recipe by adding about 20g more water than what the book calls for.  My loaves ended up being crusty with a nice soft interior and good crumb.

[ezcol_1half]bread-levain[/ezcol_1half] [ezcol_1half_end]bread-shaped[/ezcol_1half_end]

This recipe is based on Jeffrey Hamelman’s “Bread – A Baker’s Book of Techniques and Recipes”

Levain:

  • 145g AP flour
  • 10g rye flour
  • 90g water
  • 30g mature starter

Final Build:

  • 605g AP flour
  • 200g whole wheat
  • 40g rye flour
  • 580g water
  • 18g salt
  • 250g levain
  1. Mix the levain and let it mature for 8-12 hours.
  2. When the levain is ready, mix the flours and add most of the water, reserving some for later.  Mix and let autolyse for 15 minutes.
  3. Break up the levain and add it to the mixture, mix and knead until well incorporated. Add the remainder of the water.
  4. Add salt and knead until well incorporated.
  5. Add a little more water if desired and knead until fully incorporated.
  6. Transfer the dough to a bowl and cover.  After 30 minutes stretch and fold the dough.  Repeat this two more times at 30 minute intervals.
  7. After an hour and a half of rest and stretching and folding, let the dough proof for another hour and a half to 3 hours.
  8. Divide the dough and pre-shape, then shape as desired.
  9. Proof for an hour and a half at room temperature or up to 12 hours in the fridge.
  10. Add your baking stone to the oven and pre-heat the oven to 450˚F
  11. When the oven is ready, bake under steam for 15 minutes.  Rotate after 15 minutes and let bake another 20-30 minutes until done.

bread-final2

submitted to YeastSpotting

Filed Under: Bread Tutorials Tagged With: baking, bread, cheese tray breads, le cloche, recipe, rye bread tutorial, sourdough, whole wheat, wild yeast

3.08.15 By nick Leave a Comment

Oatmeal and Rye Sourdough

oatmeal and rye
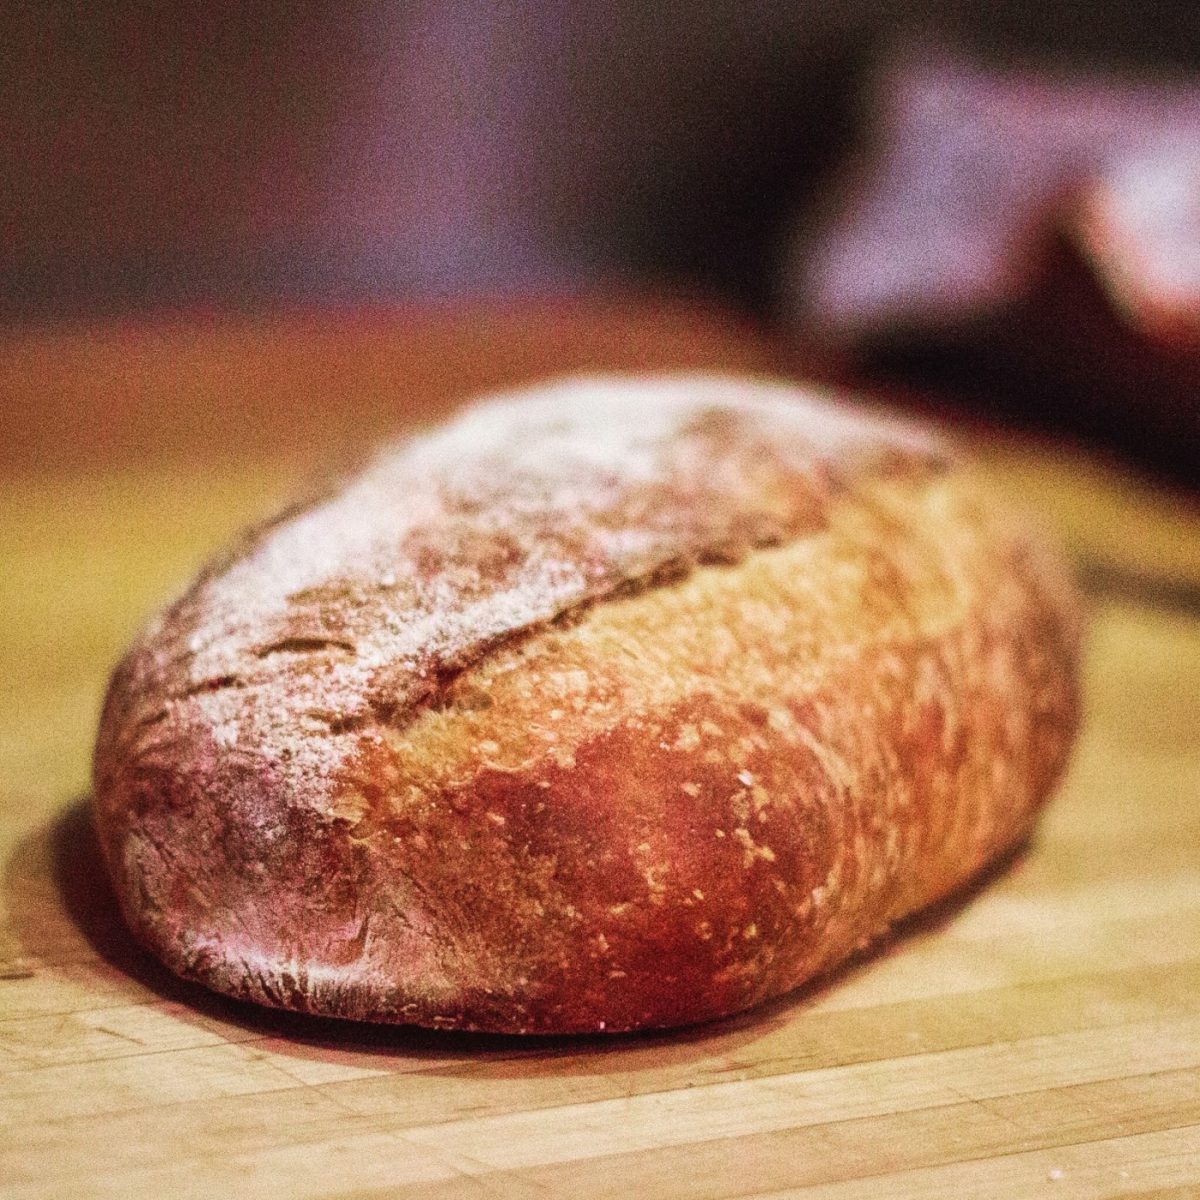
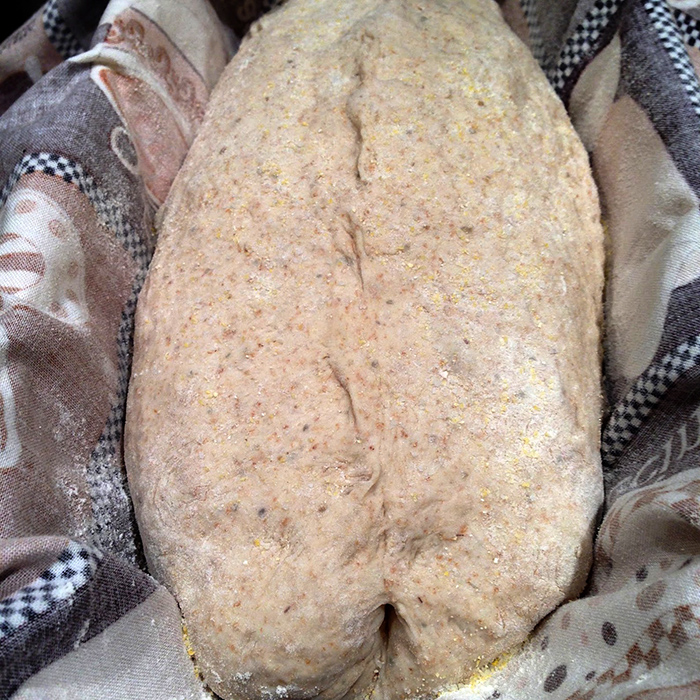
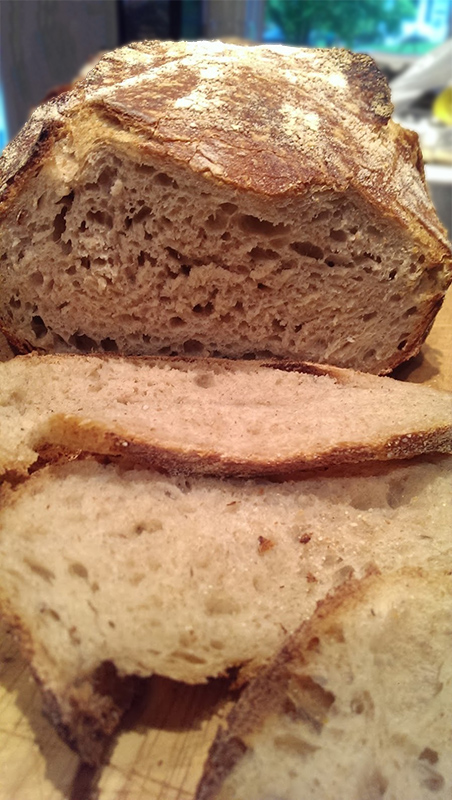
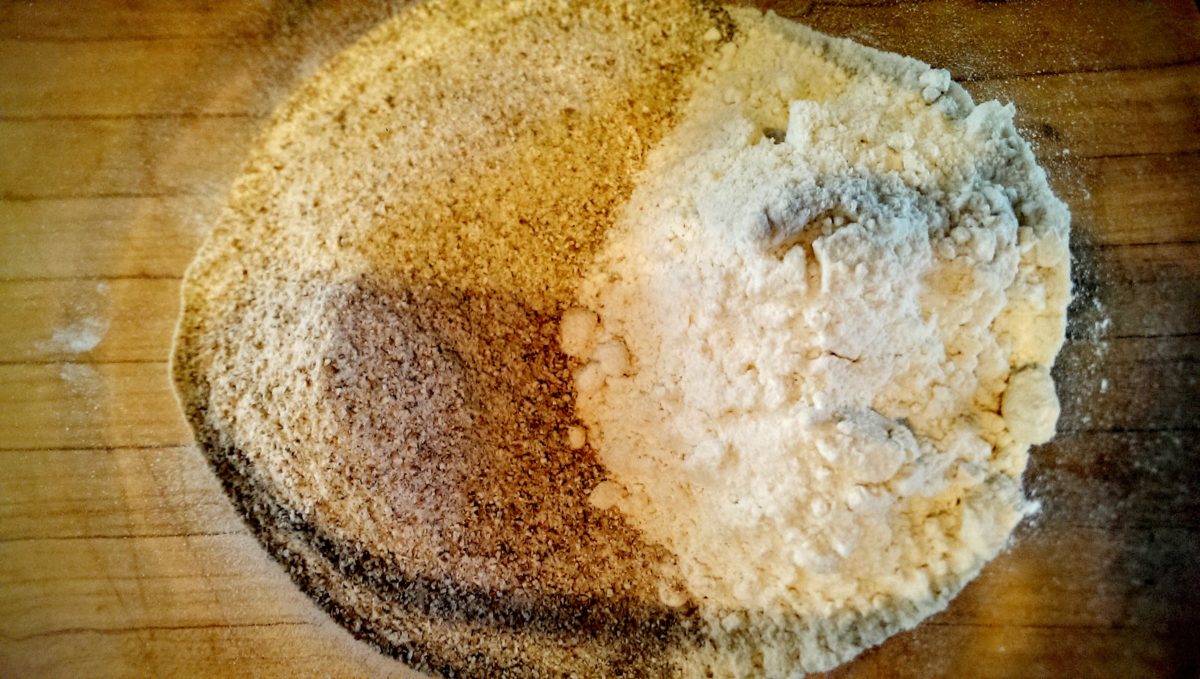
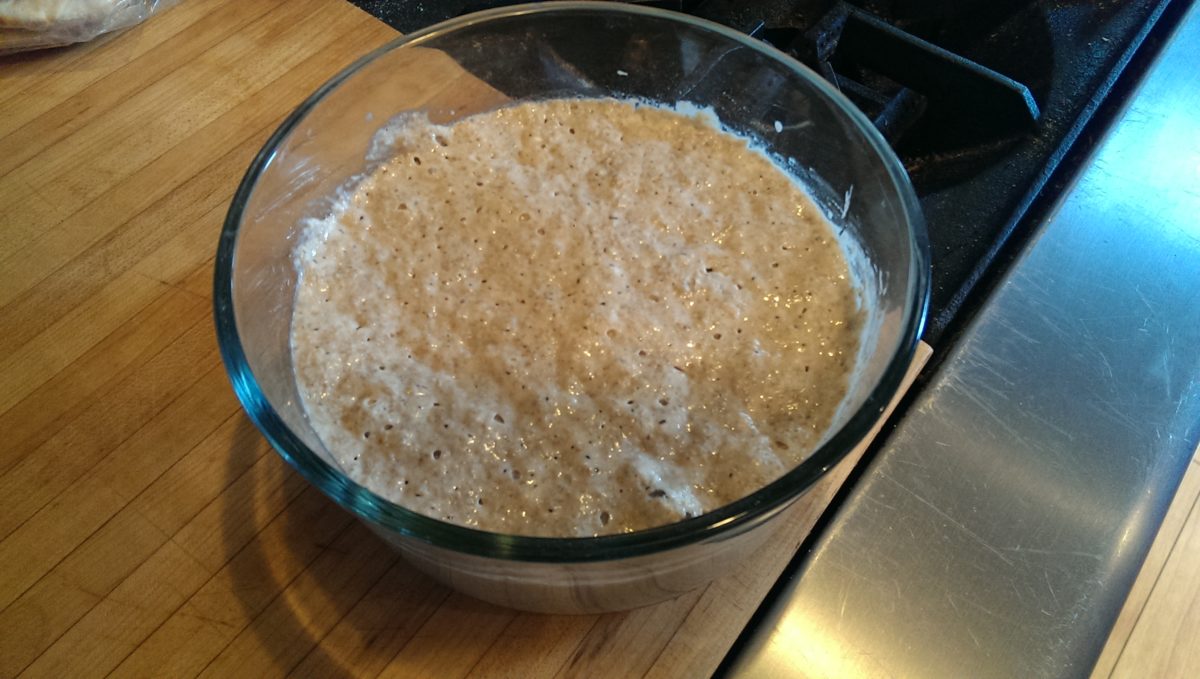
It’s been warm here in Central PA for the last few weeks so it’s a wonder that I concocted this recipe.  Oatmeal and Rye make me think that it would pair well with hearty soups or stews but, as it turns out, this light and tangy bread is a nice companion to PB&J, butter, eggs, or just about anything else.  The flavors are pretty subtle but definitely there.  It’s certainly a bread whose recipe I’ll keep around and I’ll probably try it again this winter, maybe with a hearty soup!

To make this loaf, I started with my mature levain, which is just a 100% hydration AP flour starter.  I added 25g of it to 100g of rye flour and 100g of King Arthur AP flour, resulting in what I dub the yin-yang starter for the weak AP flour and the strong rye.

starter

I then added enough water to make it a 100% hydration starter, or 225g.  After about 10 hours my starter was alive, bubbly, smelling healthy, and looking good!

rye starter

I then proceeded as follows.

  • 350g of the starter
  • 600g of KA AP flour
  • 100g of freshly milled oat flour
  • 425g of water
  • 25g of salt

Mix all the ingredients together and let sit for 30 minutes.  Stretch and fold every 30 minutes for the first 3 hours per the Tartine book method.  After the last stretch and fold, divide the dough and preshape.  Let the dough relax and shape, then place in your proofing basket.  I put my loaves in the refrigerator overnight but you could let it rise for another 2-3 hours and bake right away.  It was hot in our kitchen so I decided to wait until it was a bit cooler the next day.

  • Preheat your oven to 450°F.
  • Turn your proofed loaf on to a peel and slash the bread as desired.
  • Cook under steam for the first 15 minutes and complete without steam until done, roughly 30 minutes more.


Filed Under: Bread Tutorials Tagged With: baking, bread, cheese tray breads, oat flour bread, oat flour sourdough, oatmeal bread, recipe, rye, rye batard, rye sourdough, sourdough, wild yeast

  • « Go to Previous Page
  • Go to page 1
  • Interim pages omitted …
  • Go to page 4
  • Go to page 5
  • Go to page 6
  • Go to page 7
  • Go to Next Page »

Copyright 2015-2021 Makebread.net